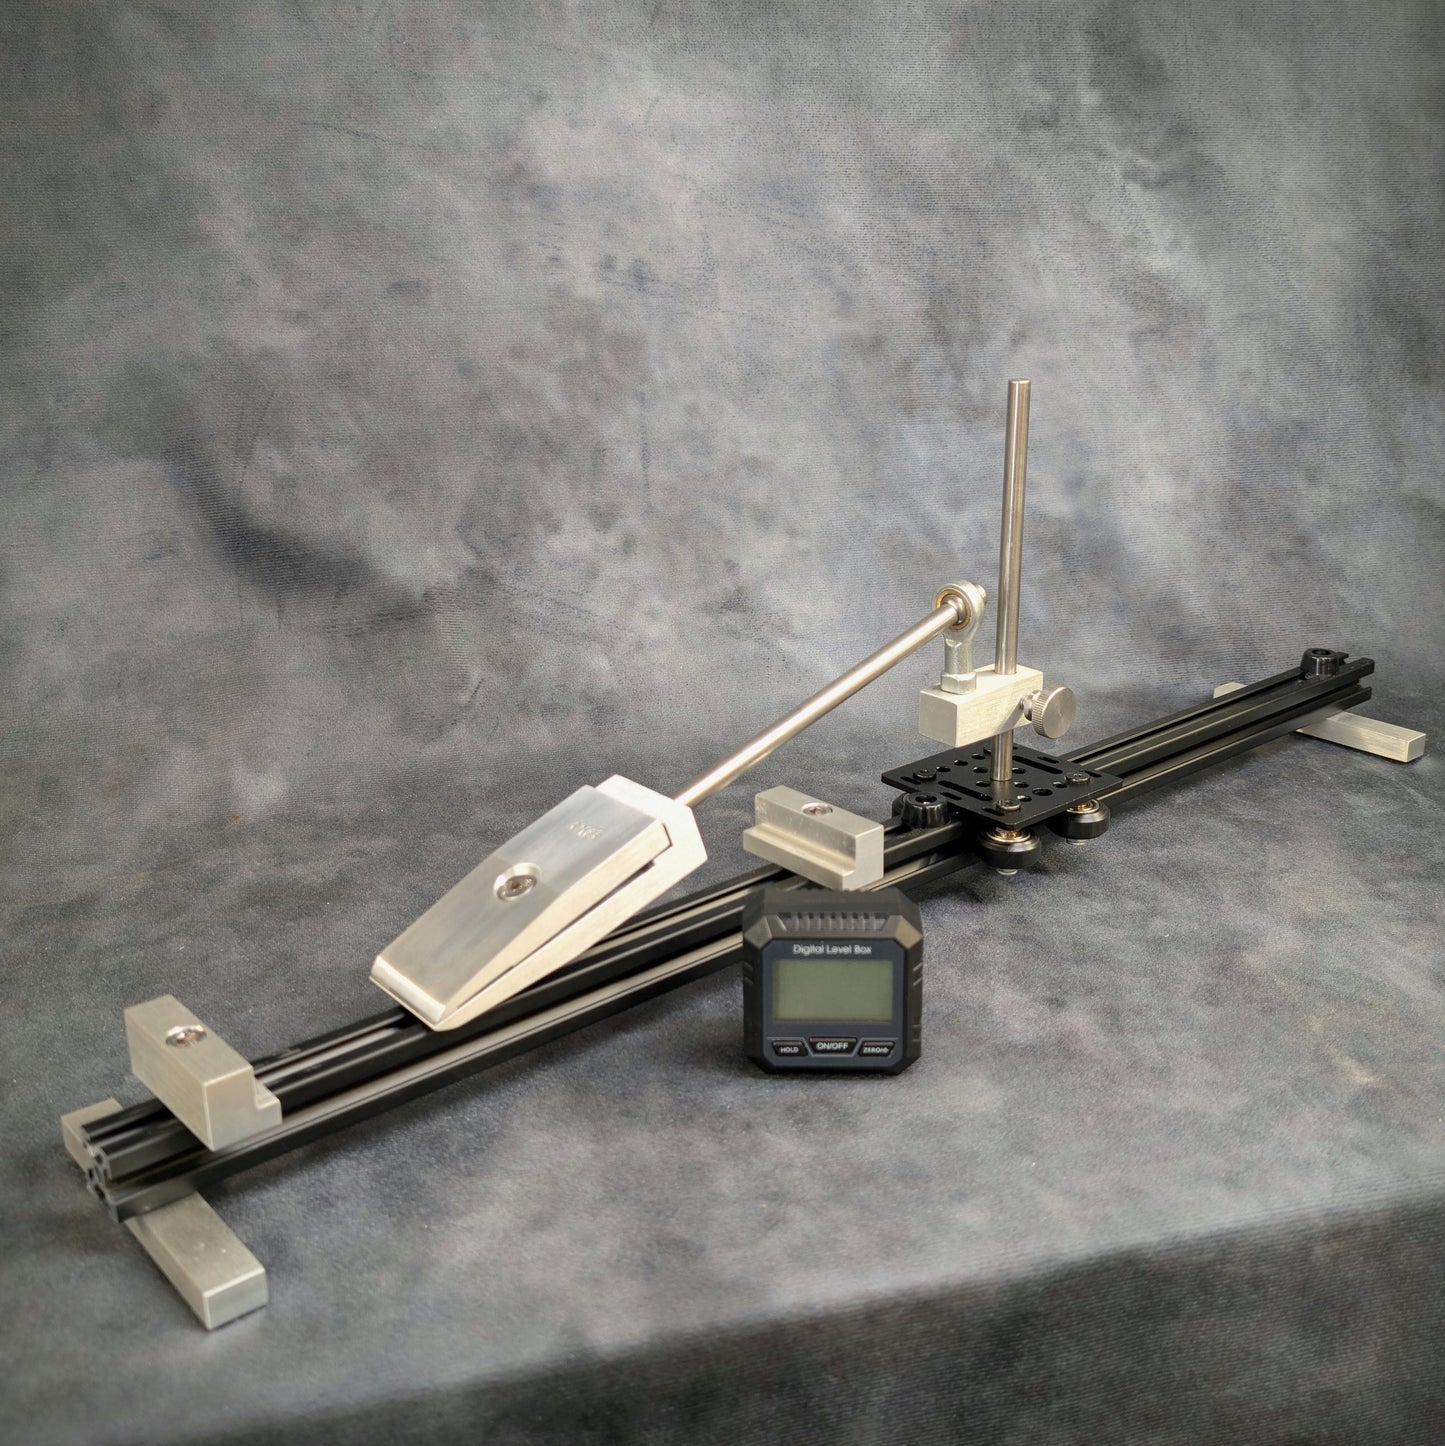
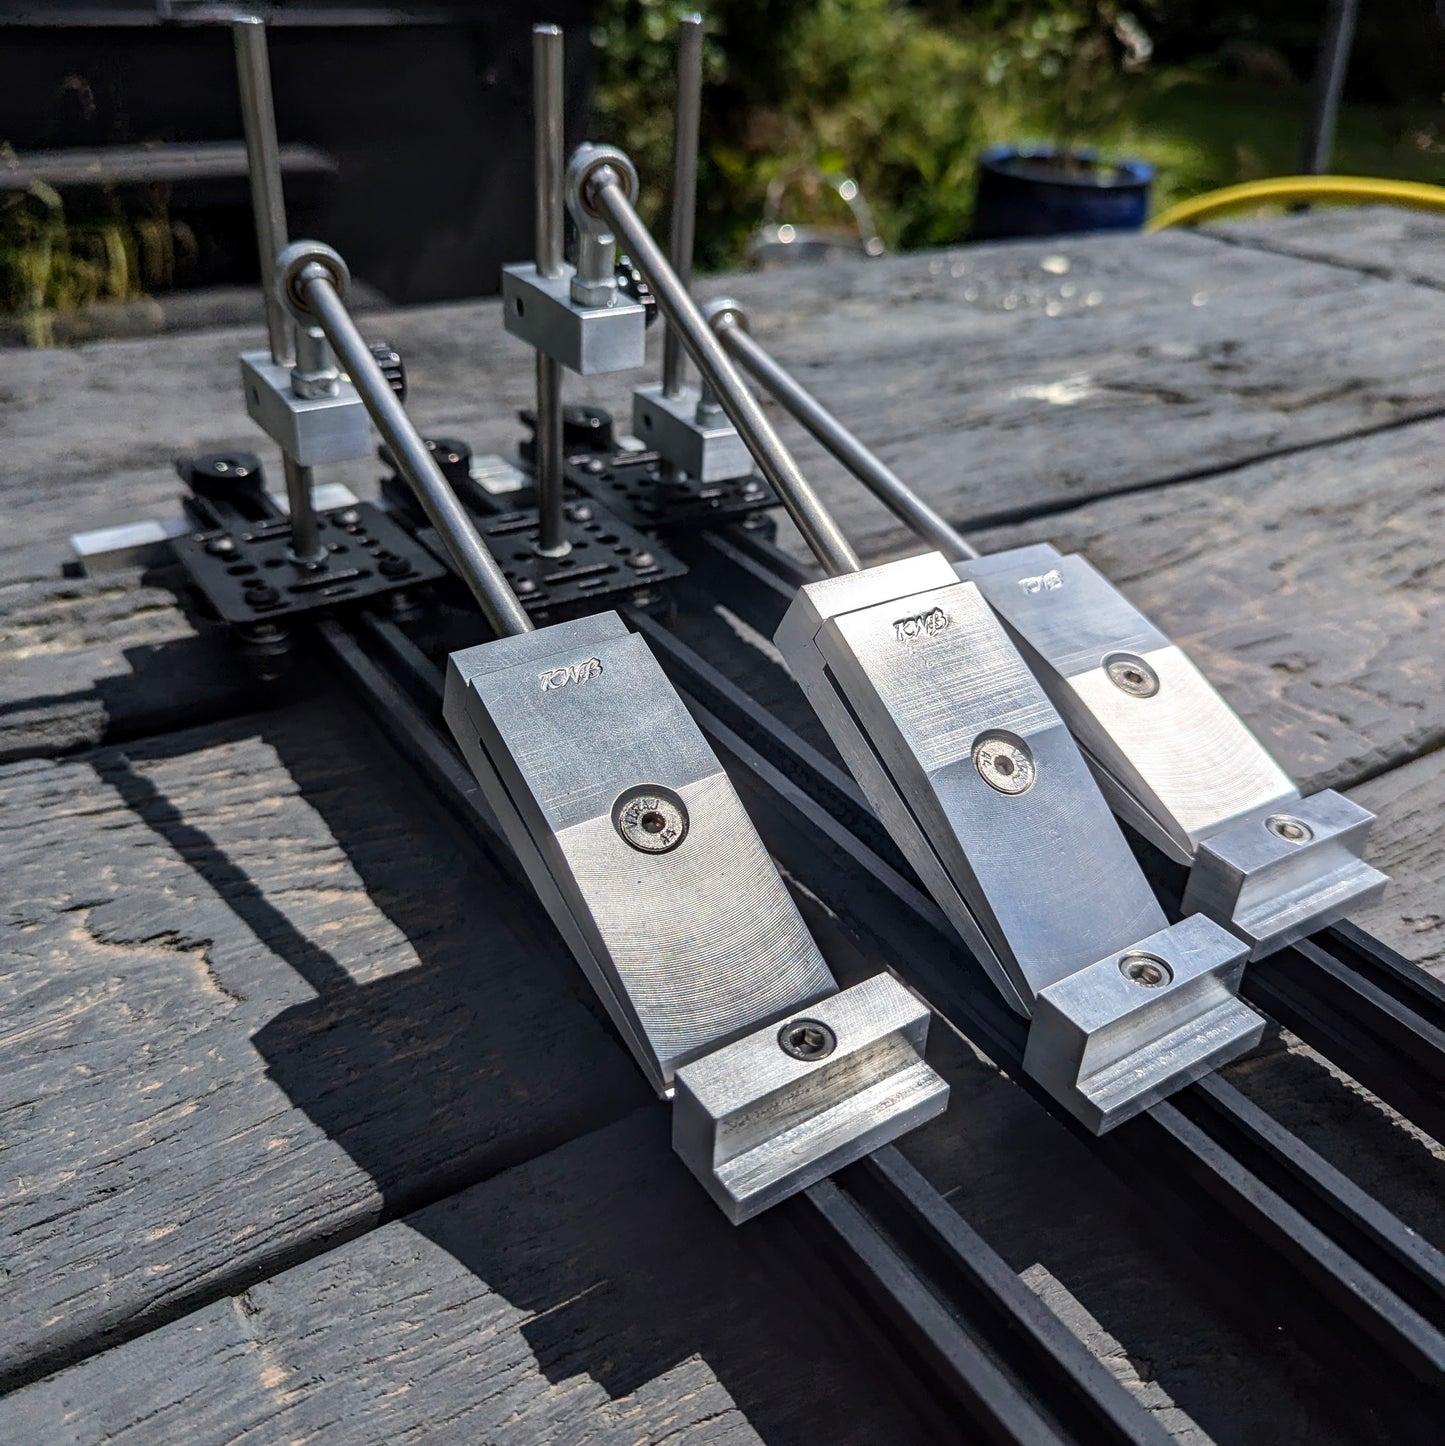
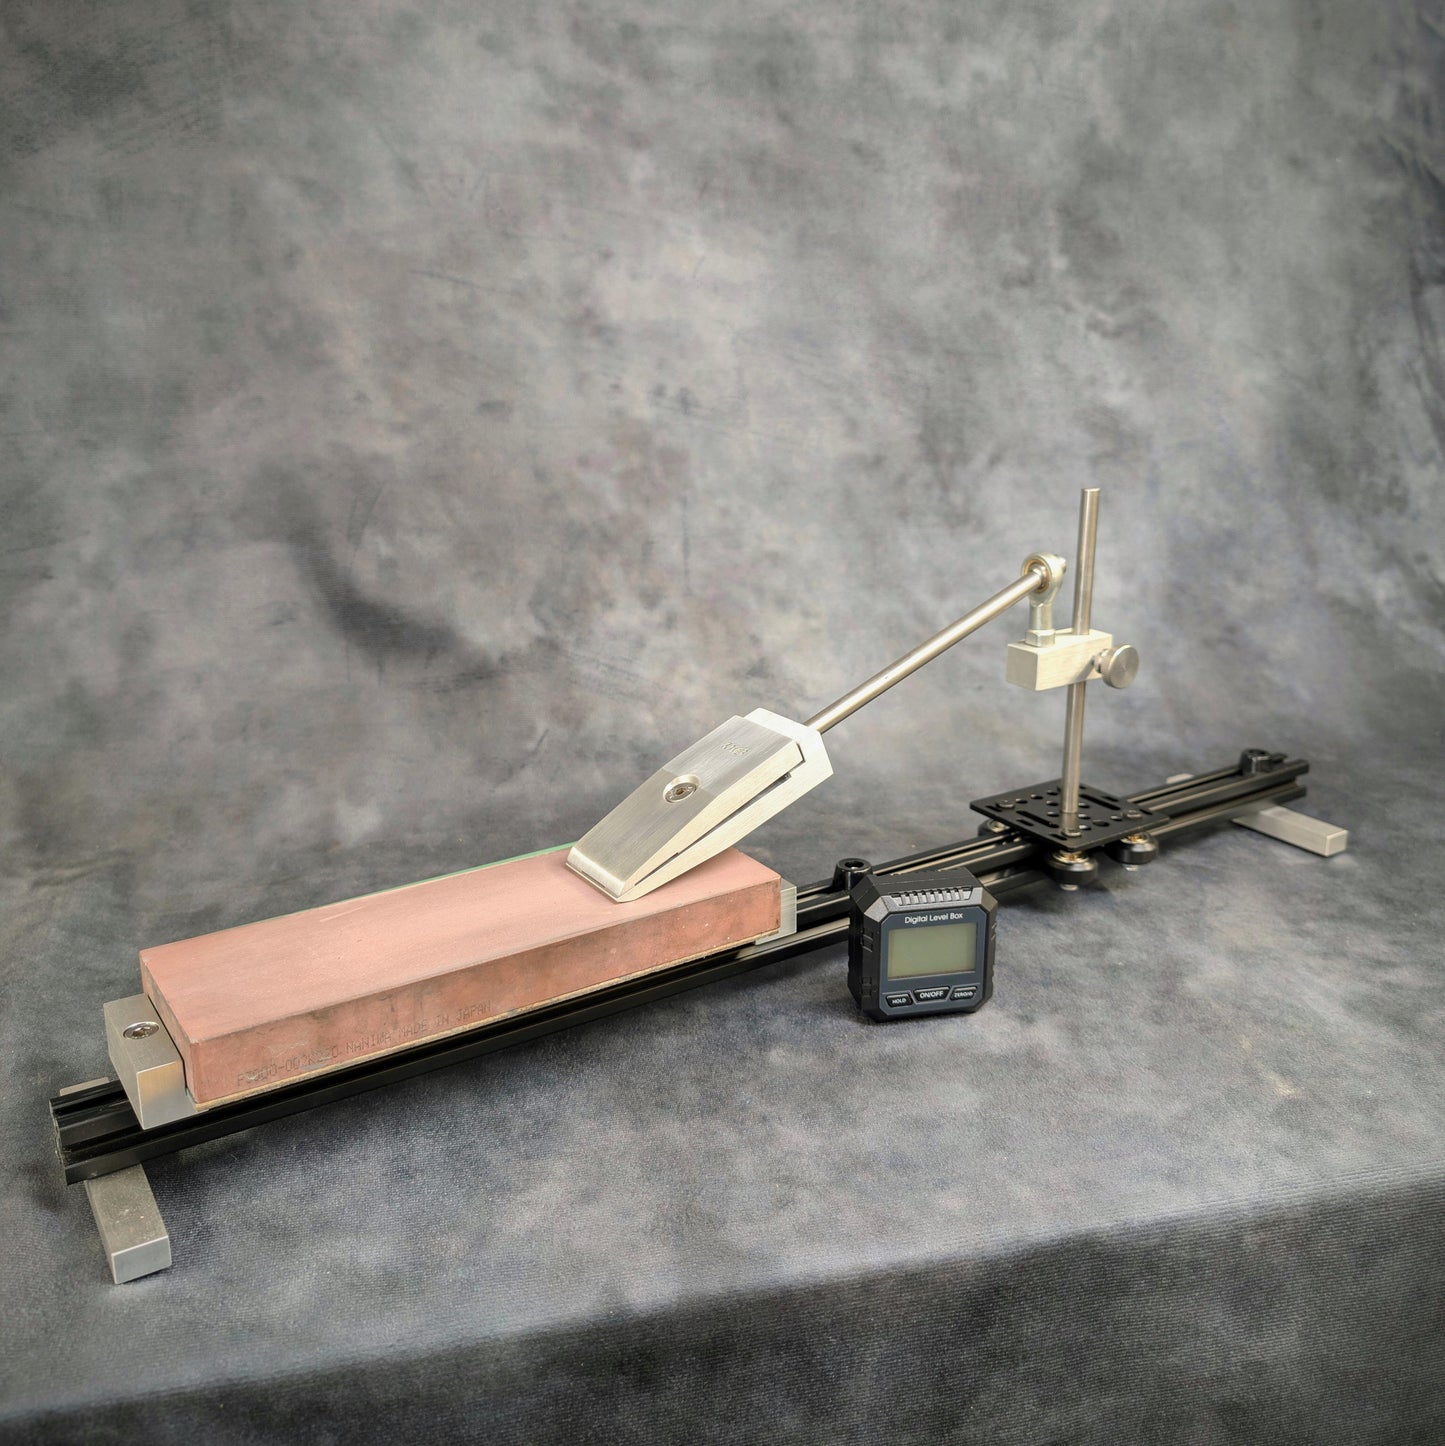
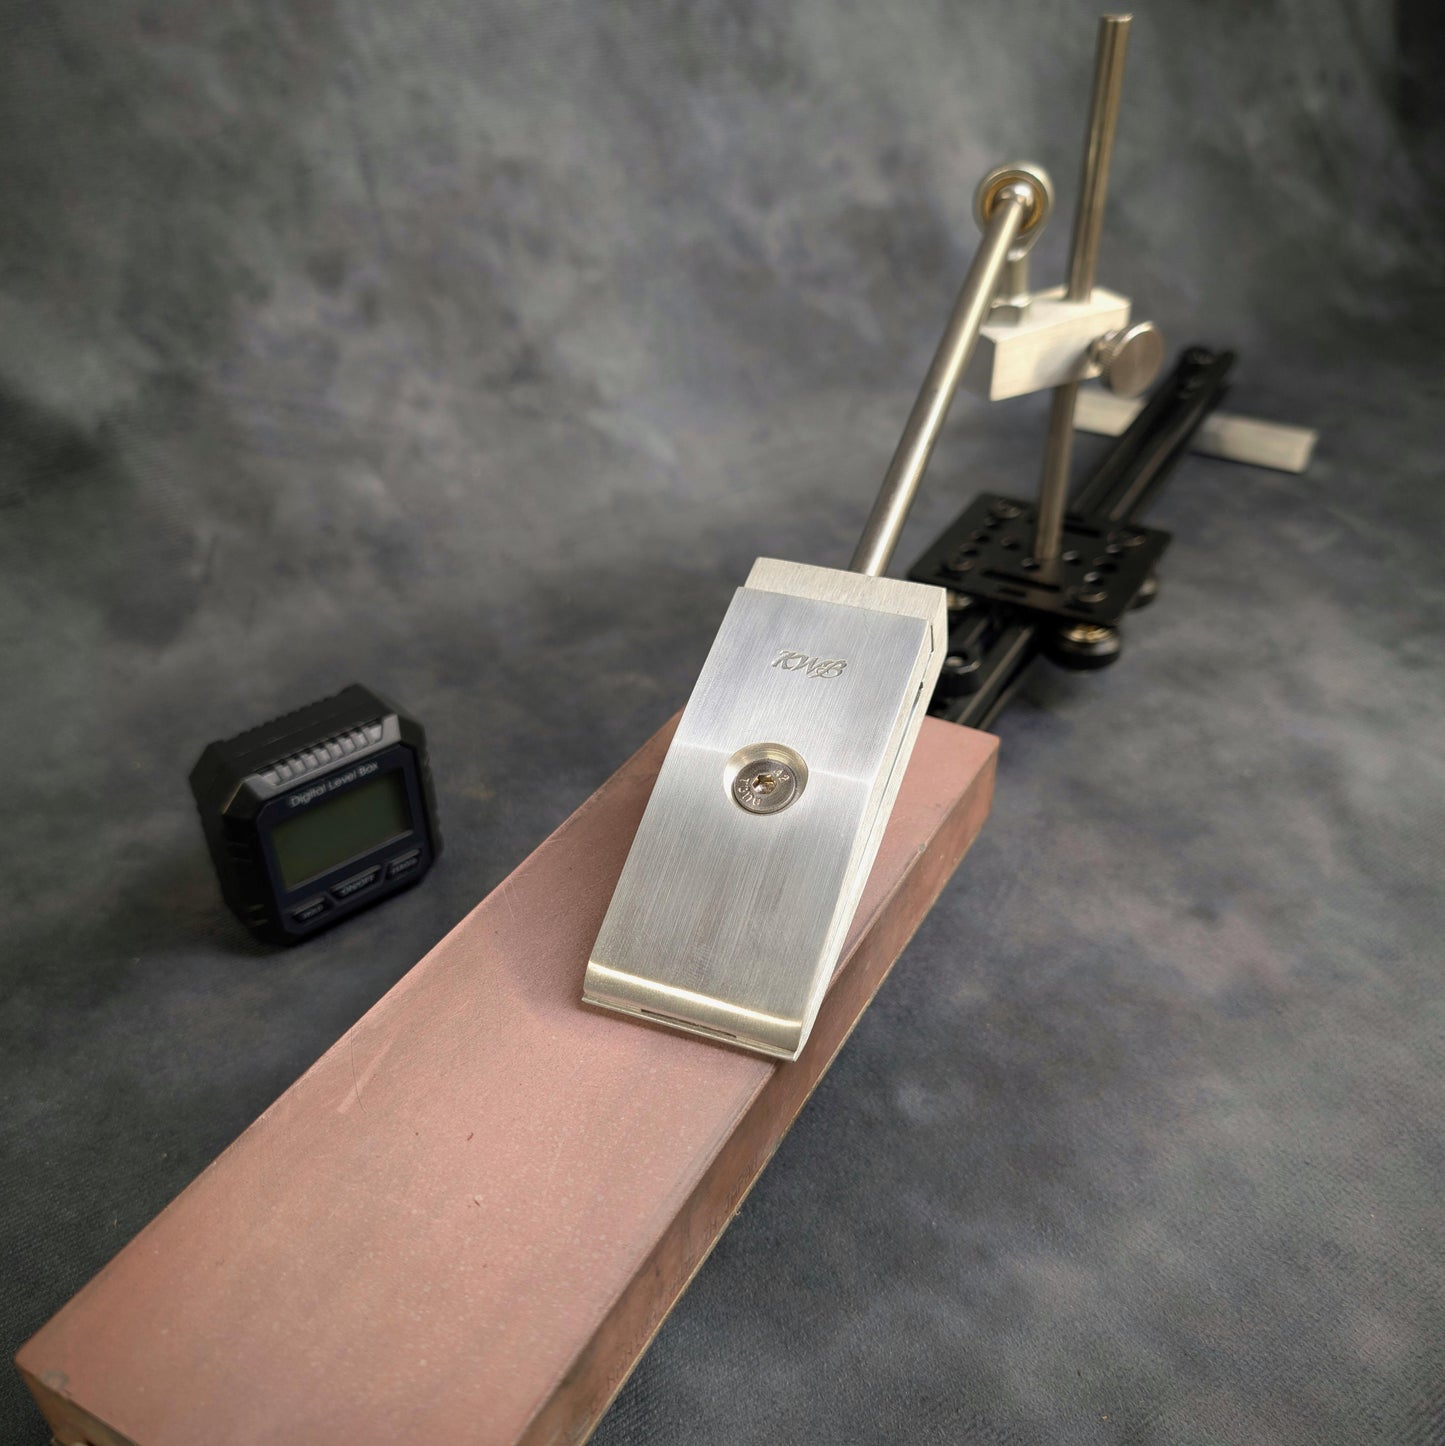
Over the last 9 years we have been using many sharpening jigs in pursue of the perfect edge and for one reason or other, they're all either garbage or ridiculously expensive, especially when you start wearing through the stones and needing to replace parts. After many generations and requests to produce them for sale, here it is, the KWB Sharpening System. Combining the lifespan and benefits of full size stones, freedom of freehand whetstone sharpening, and the reliability and professional accuracy you get with a jig.
Features:
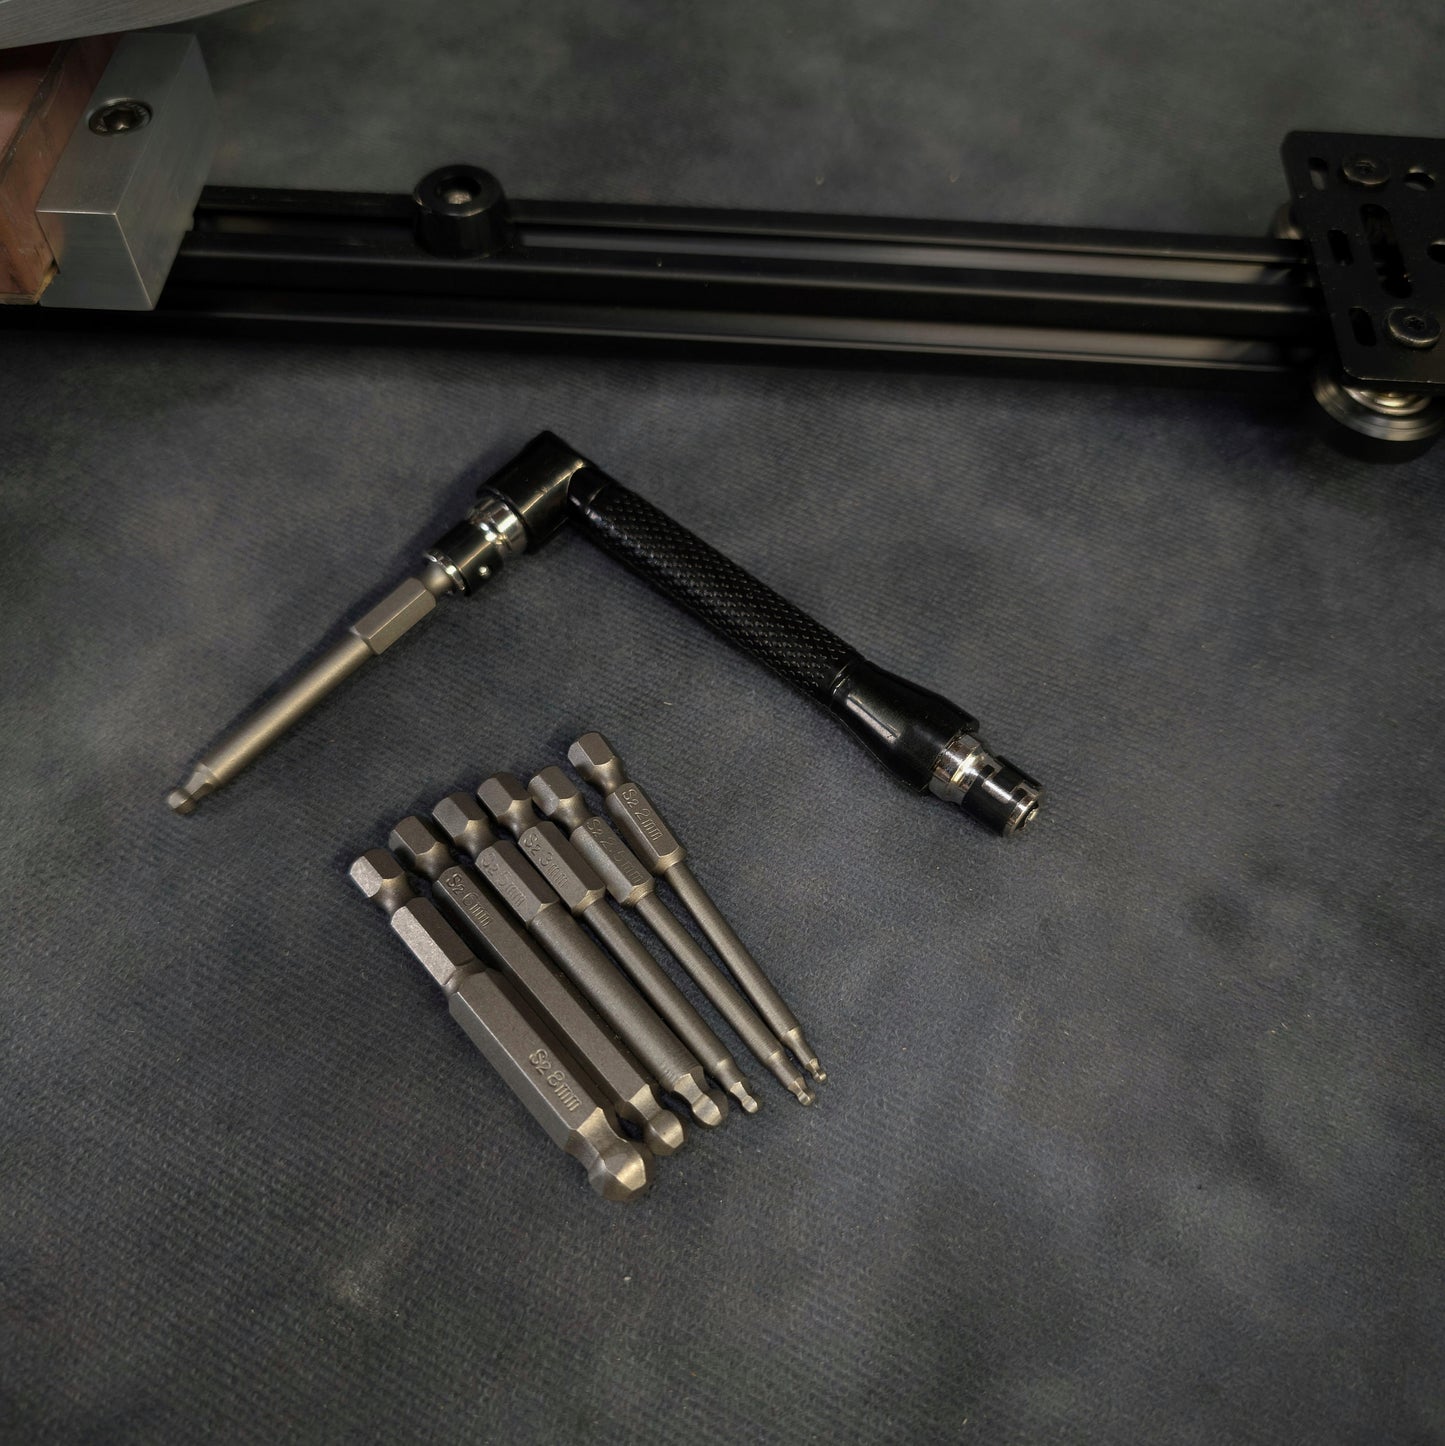
Fully customize-able with extras, spares and future upgrades.
Compatible with any stones.
Light weight and portable.
Professional, handmade quality that lasts.
Stainless steel and aluminium parts.
Suits most blade thicknesses and lengths (see specs for details).
Precision machined parts.
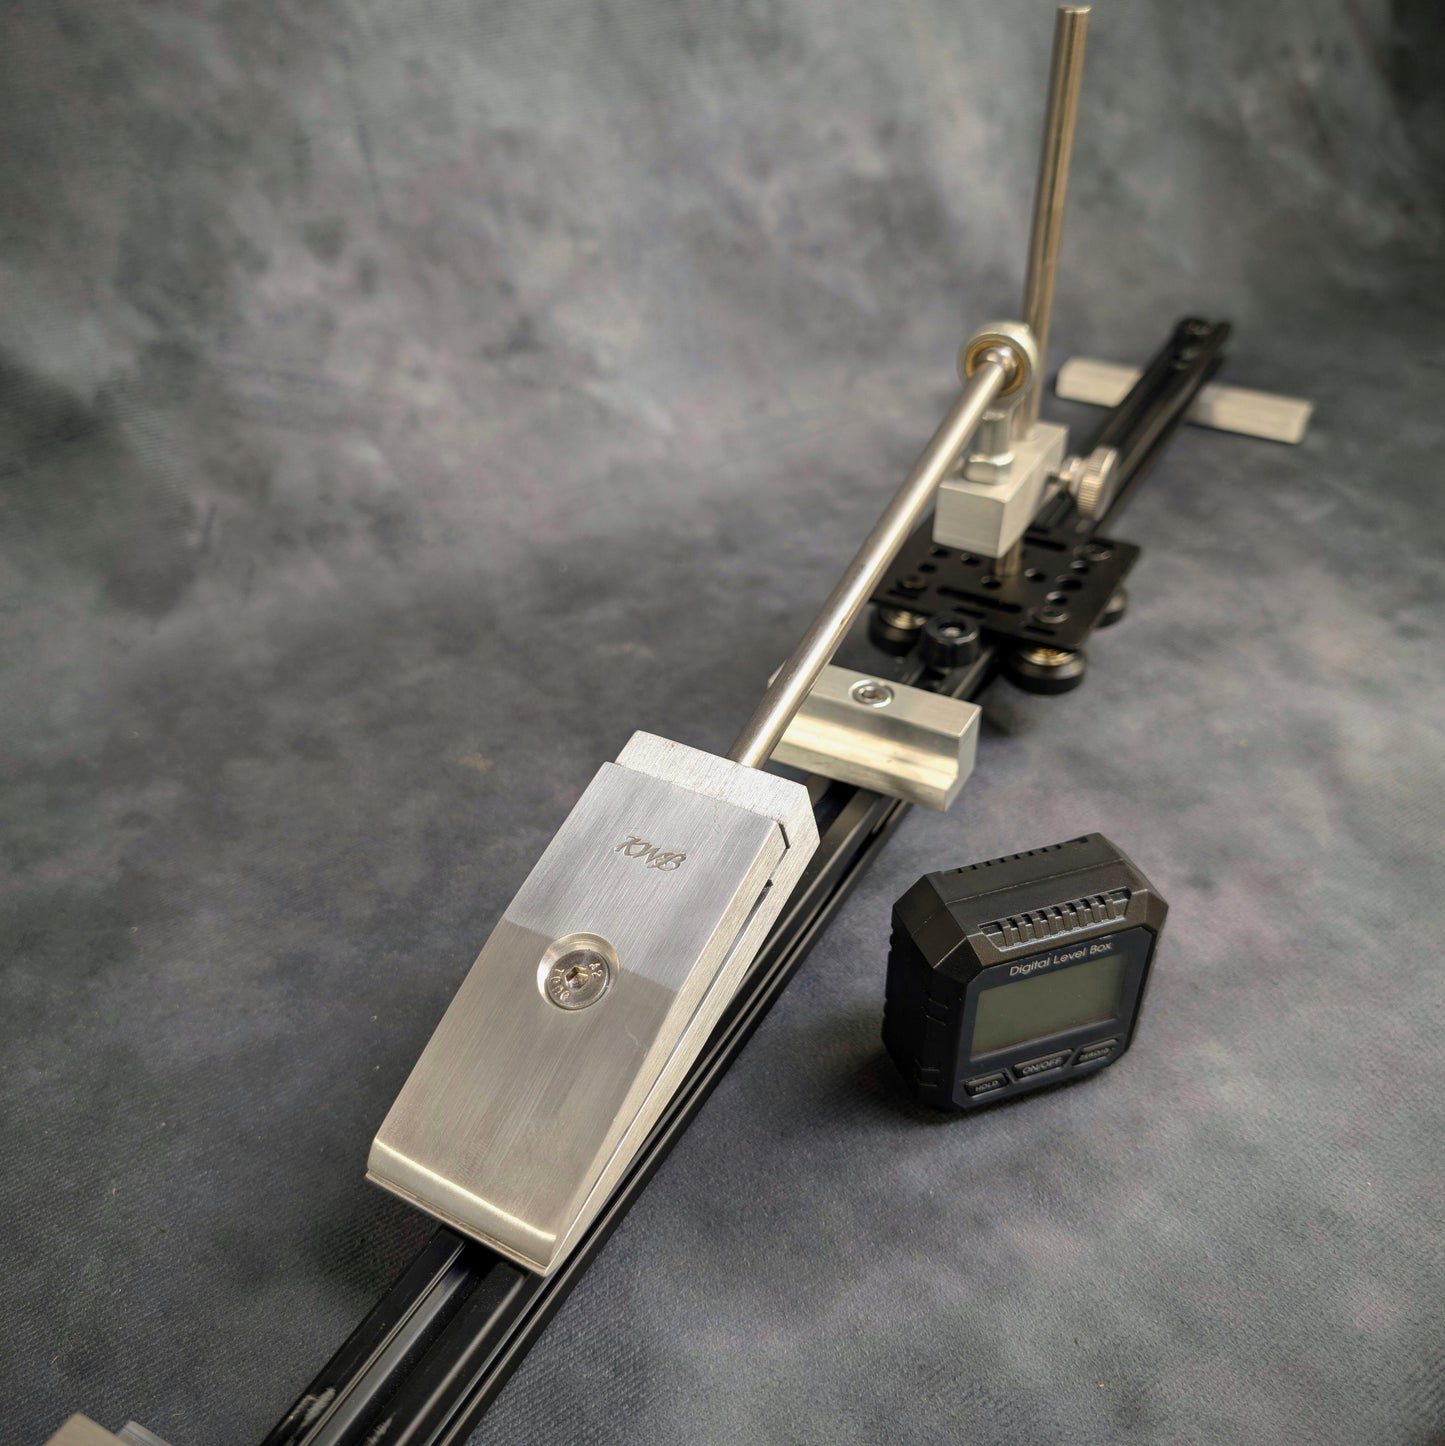
Adjustable movement limits to prevent running off the stone.
Recessed clamp contact points to ensure a secure hold on most surfaces.
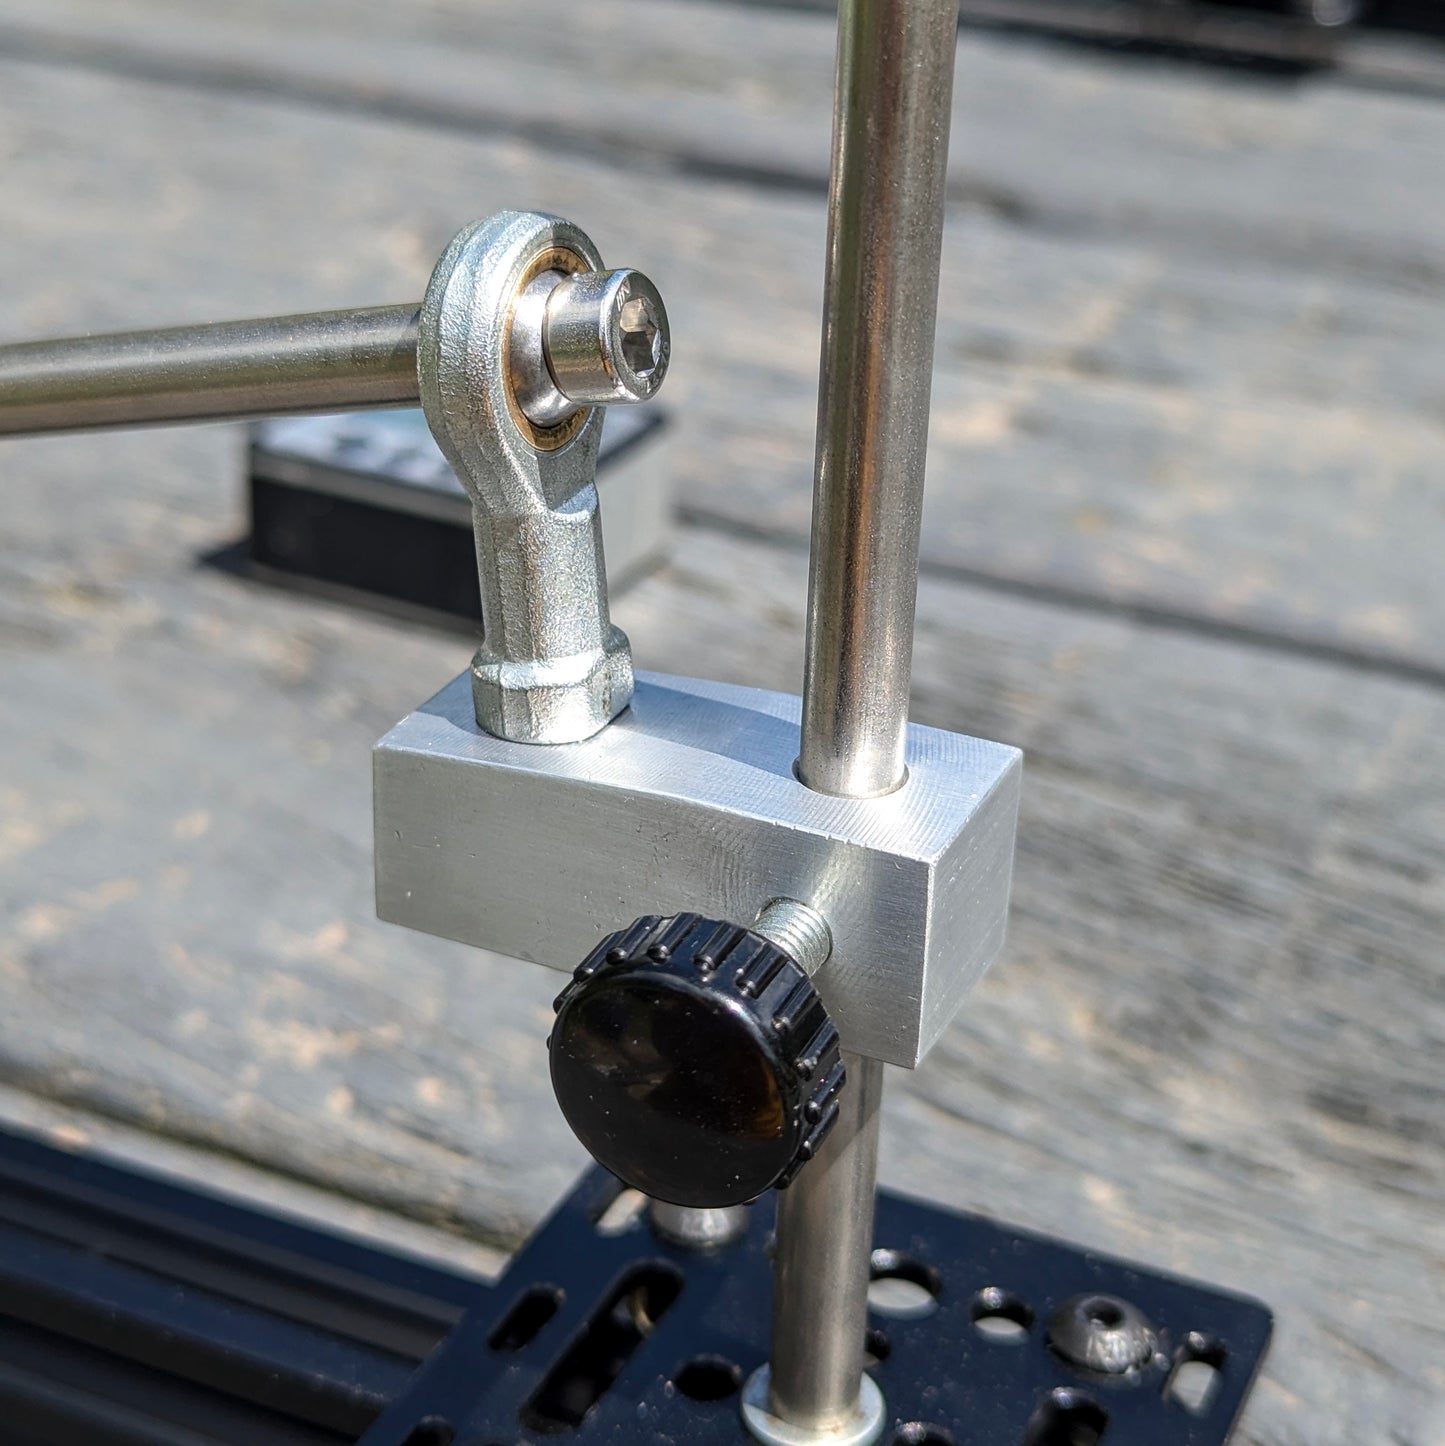
Precision angle adjustment using a digital angle finder (Optional extra, please select from drop down box).
Stones are not included, please let us know if you'd like to see them as optional extras.
Specs:
Angle range from 0-25 degrees. Smaller blades at lower angles will cause the clamp to rub. I have done paring knives at 18 degrees without issue and the clamp could be ground down for more clearance if you mostly work with smaller blades.
Blade thickness up to 6mm.
Maximum blade length up to 80cm (can be flipped without removing clamp up to around 40cm)
Dimensions - 60x10x18cm.
Directions:
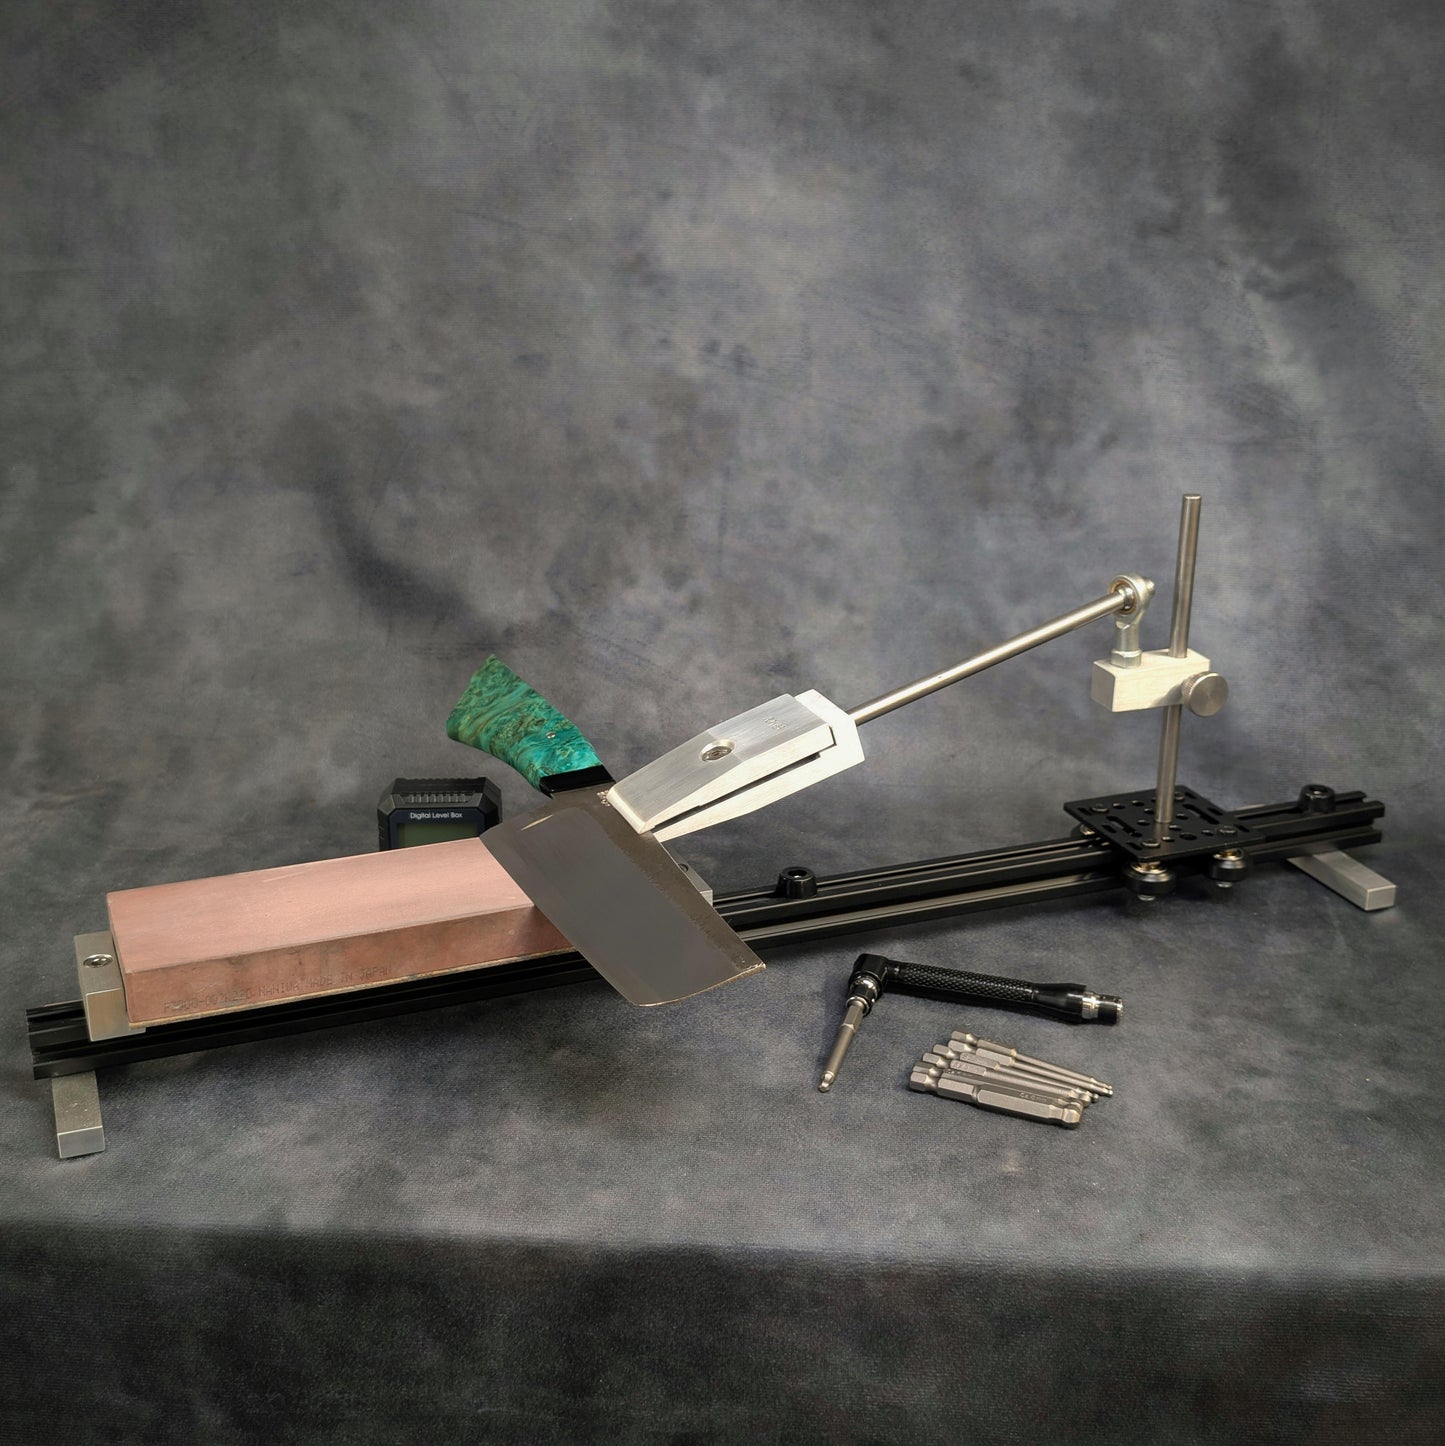
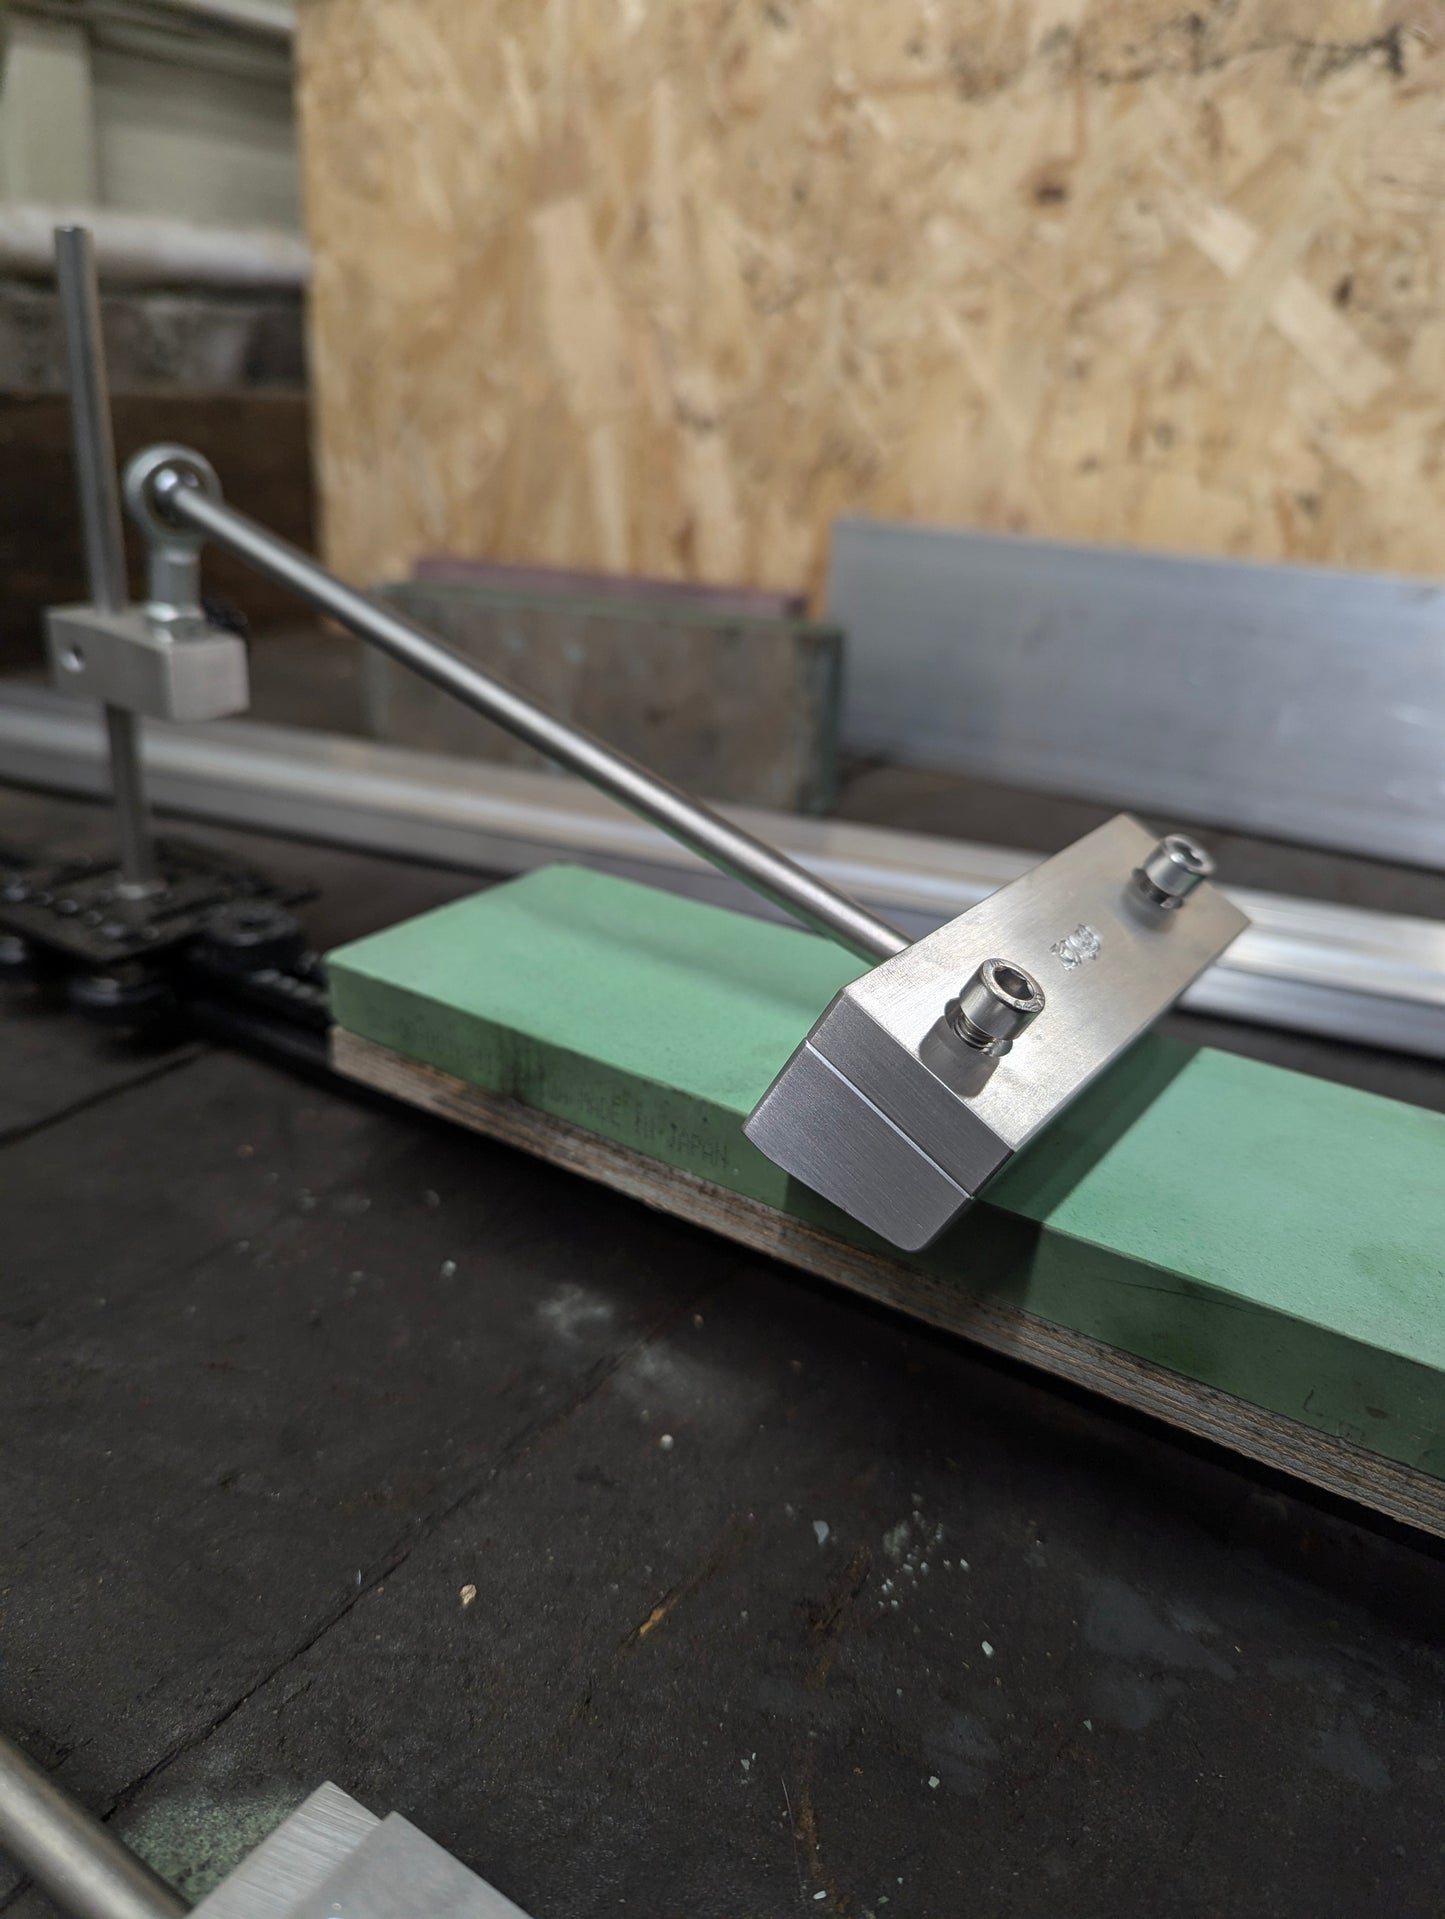
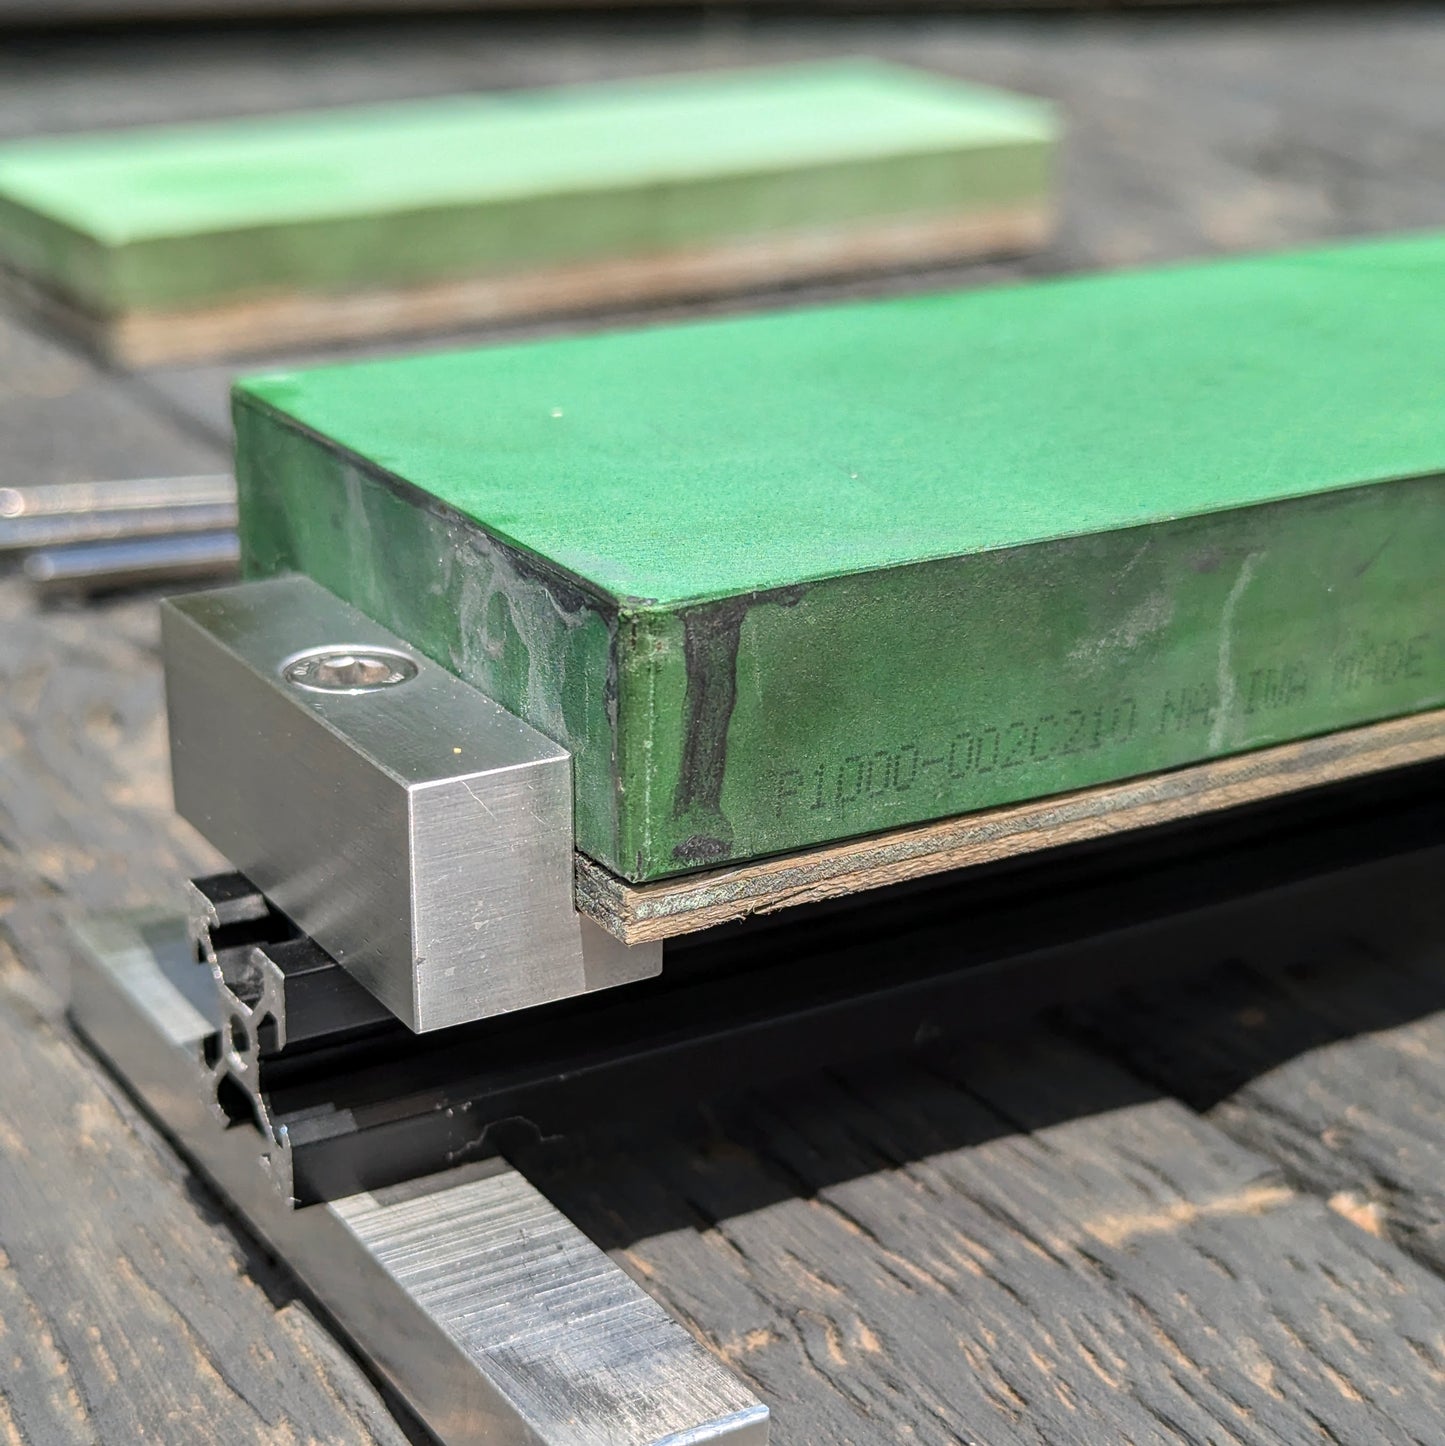
Set your first stone in the holder, adjust and tighten the supports. If using multiple stones it helps to mount them on boards so they are all the same size and thickness.
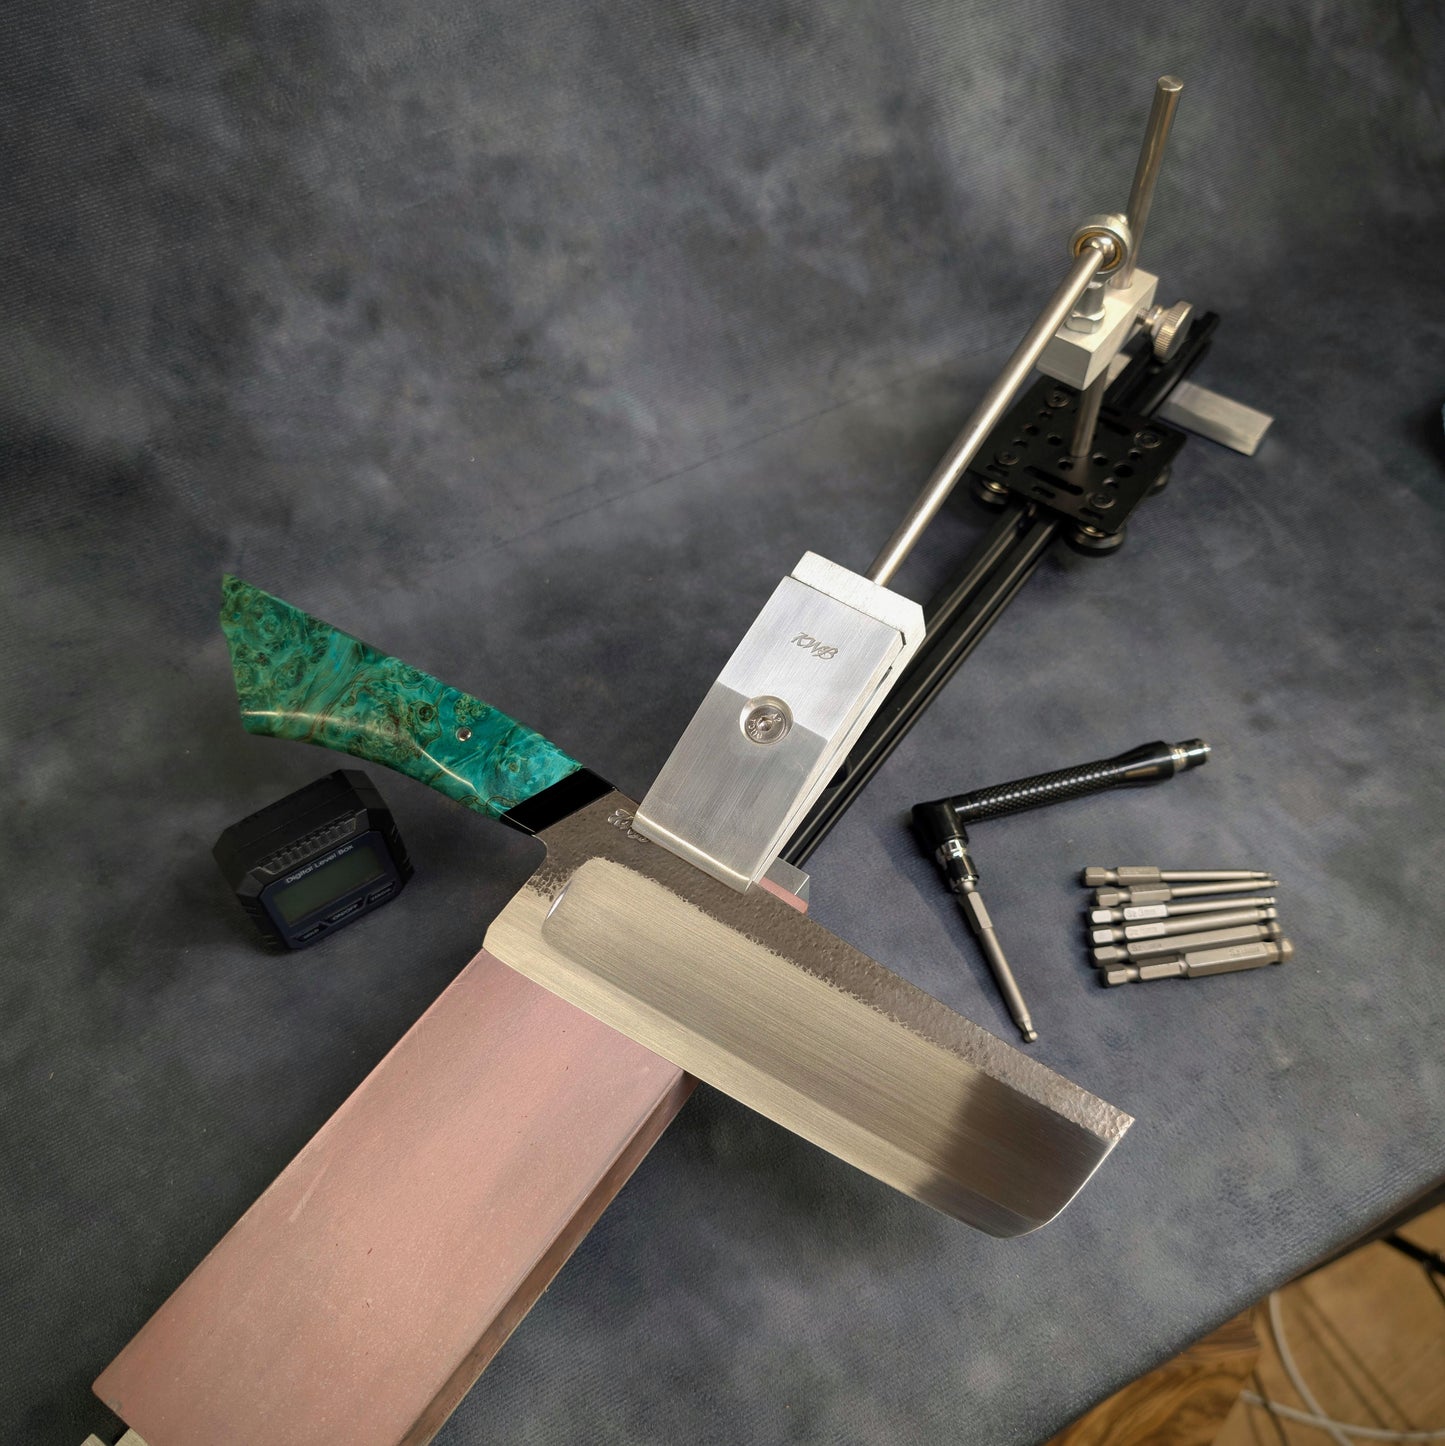
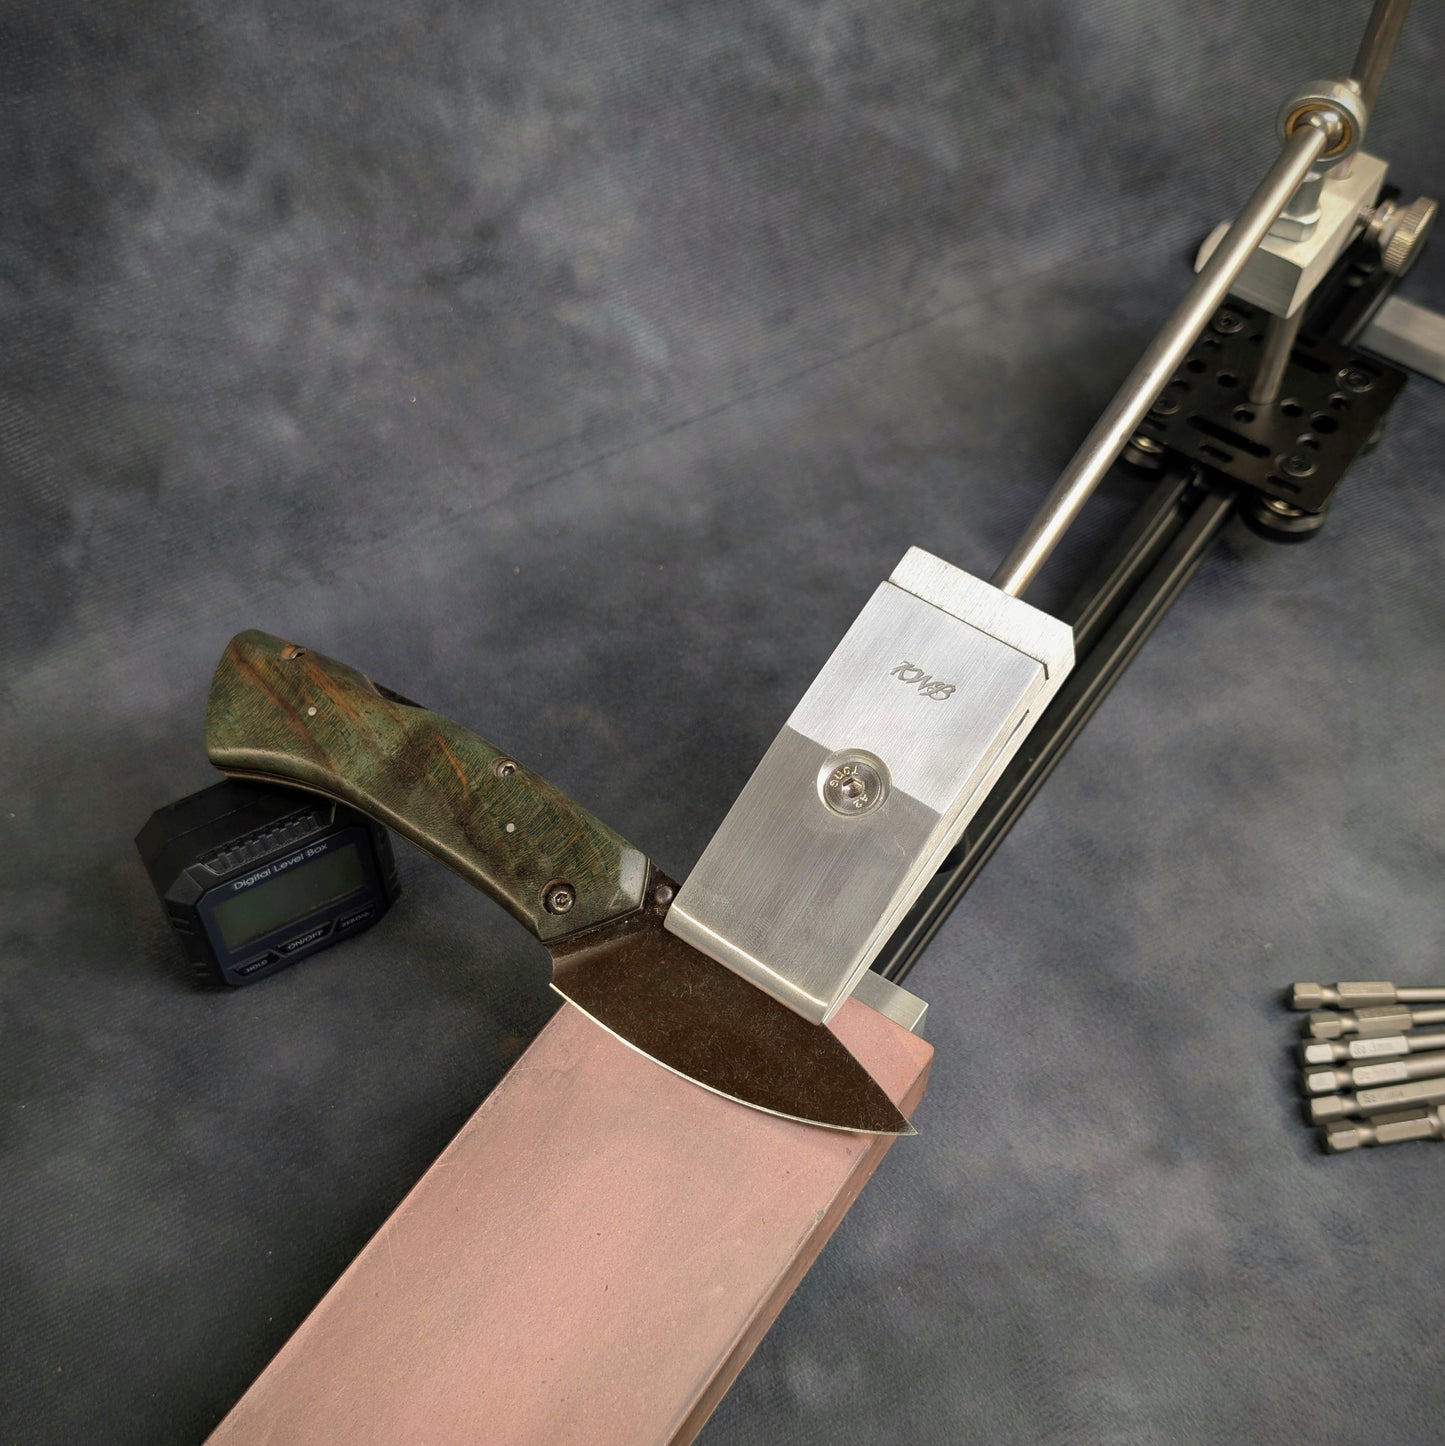
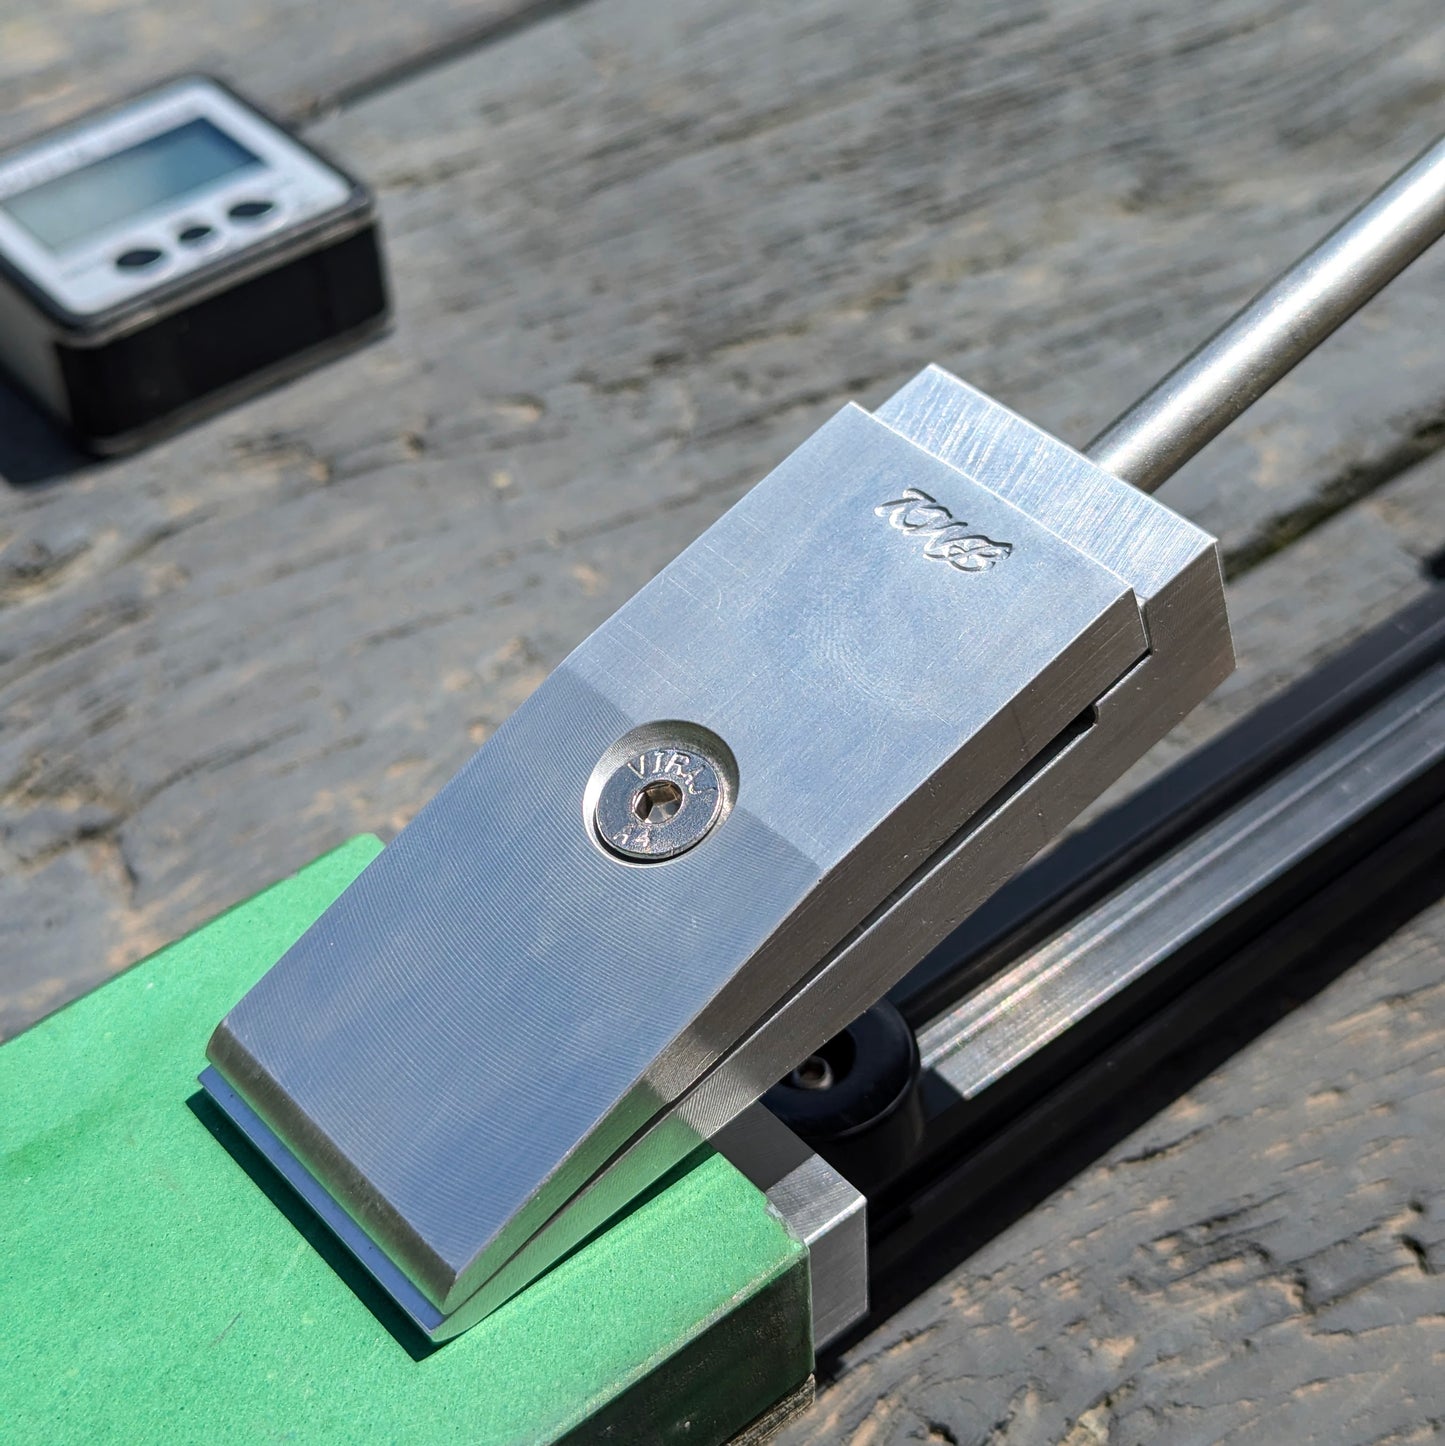
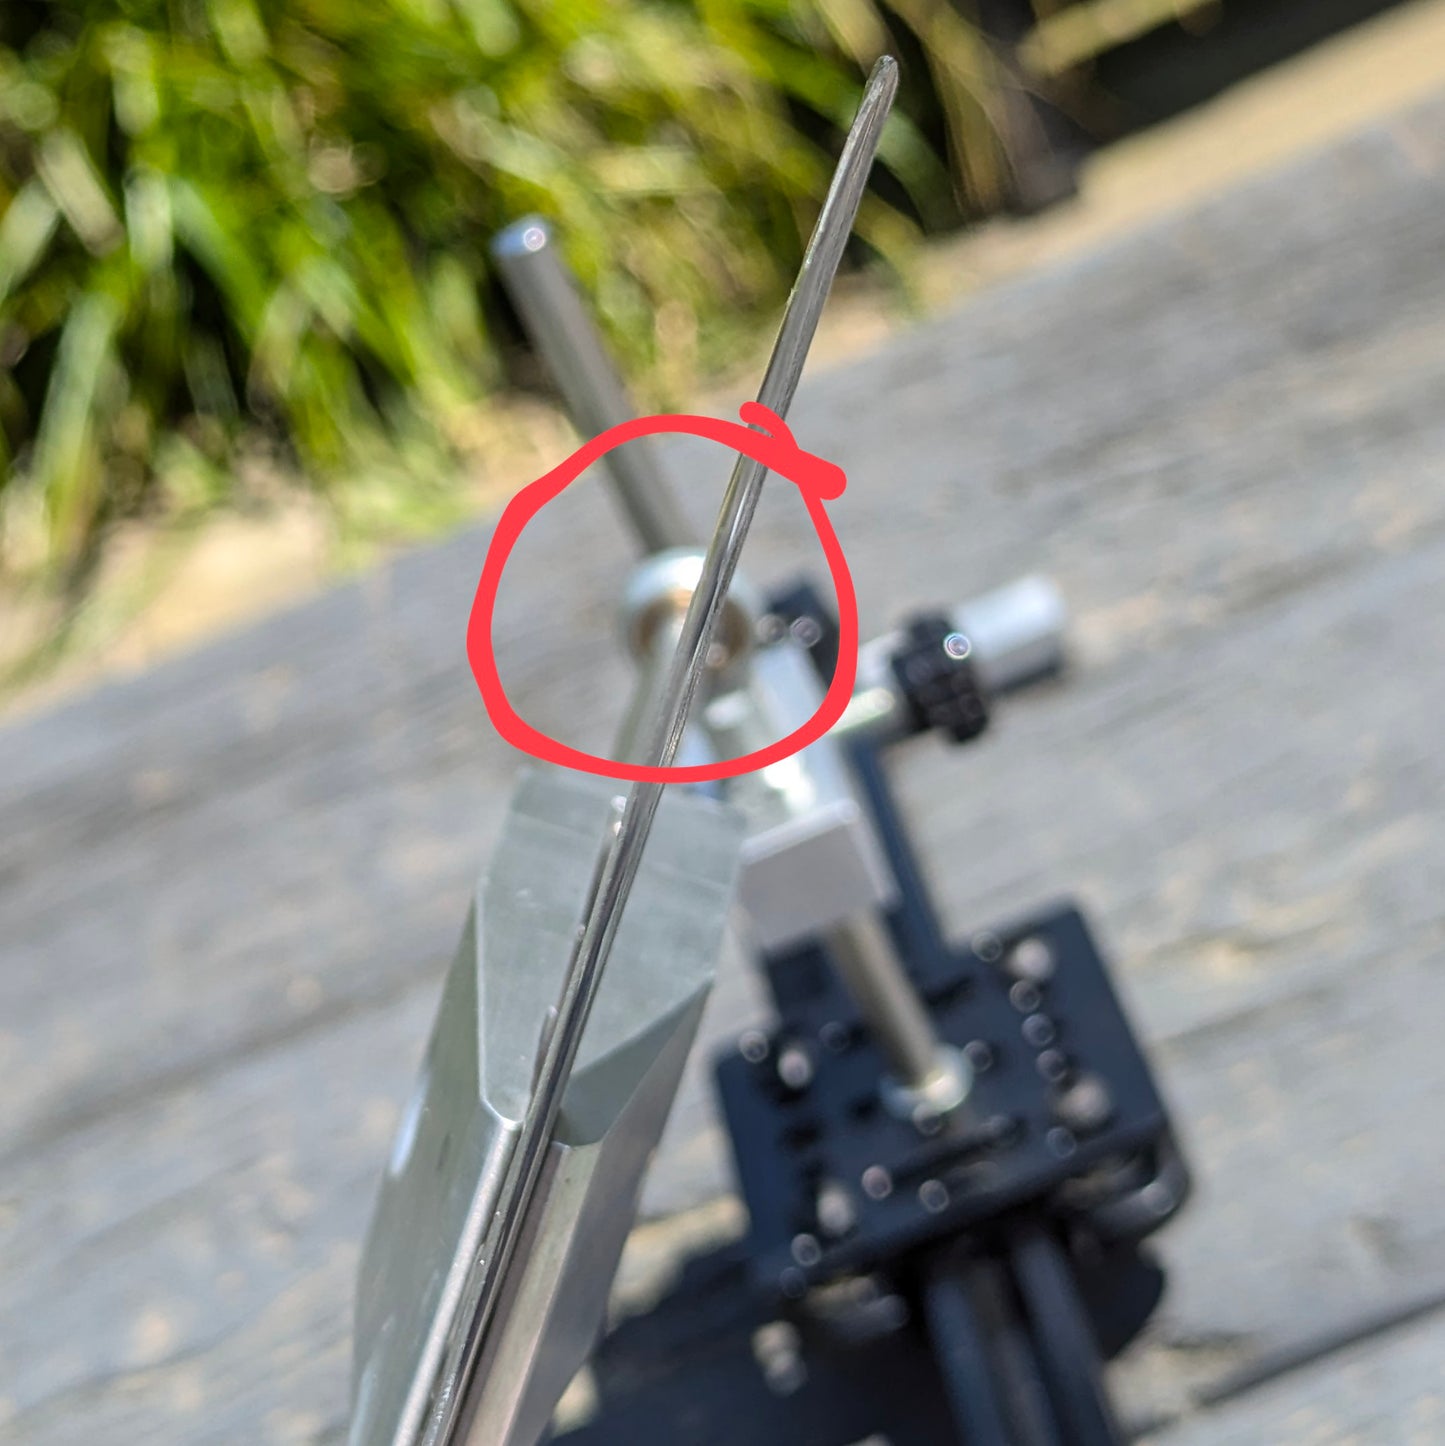
Clamp the knife holding by the flats if possible, towards the handle is usually best. Don't torque it down too hard, but a good grip is important, the aluminium clamp shouldn't mark the steel unless it starts rubbing. You could protect the surface with tape if necessary. The edge should sit straight across the stone as much as possible to ensure a consistent sharpening angle along the length of the blade. You could tilt it and achieve a steeper angle toward the heel or tip but that's a topic for another time. Ensure the knife is parallel to the clamp; If you look from edge to spine the blade should line up with the ball joint to achieve symmetrical sharpening. Blades without a flat reference surface may require some tape to shim up the edge. Any error here should have minimal effect on cutting performance, but we strive for perfection.
Set the angle: Flip the clamp so the logo is facing down, this will give you a parallel reference surface for the digital angle finder to rest once zeroed to the stone. The angle adjustment locking screw can be moved to the left or right handed position for personal preference. Most knives are sharpened at 13-20 degrees, a lower angle will feel sharper and cut better but a steeper angle will be more durable.
Set the travel stops (optional). loosen both stops and move the cutting edge of the blade close to the front edge of the stone, push the stop up to the carriage and tighten. Repeat for the back edge of the stone with the rear stop.
Sharpening: The naniwa pro stones require a splash of water but others may require soaking or cutting oil. I like to work the blade in sections, usually the heel, belly and tip, building up a small burr long the full edge before repeating on the other side. Thin knives only take a few strokes, I would avoid more than 10 or so before flipping the blade to keep symmetrical. I start at 1k grit for thin edges but chipped or thicker knives may require 400 grit. Final grit depends on personal preference, generally finer the finish, the sharper it will feel, but a toothier edge can often continue cutting once the knife starts loosing its edge. A leather strop can help remove burrs and keep the edge straight for longer.
Stropping: Finish by removing the knife carefully and stropping on leather to remove the burr. With newly sharpened knives I like a fine honing compound on a paddle strop but for daily use, clean leather is best.
Stones:
We love our Ninawa professional stones but this sharpener can be easily set up to hold anything, including a leather strop if you wish. I would definitely recommend investing in a decent brand as they will cut much cleaner. A thin or well maintained edge can be sharpened start to finish on a single 1000 grit stone and leather strop. For finer edges you can touch up with a 3000 grit and for thicker blades or chipped edges, start with a 400 or 600.
Not only has this design gone through many generations of real world use by multiple professional bladesmiths, but we are still here and improving the design so if you have any questions or special requirements, perhaps an idea for a future upgrade, optional extra or one off attachment, please get in contact.